 File - USB Image Manipulation
      Notes:
          Some notes about the 1000 Floppy Disk USB
          image structure are in order.  The Gotek
          SFR1M44-U100K floppy emulator's internal
          formatter allocates 3200 512-Byte sectors
          for each floppy disk image, the first 2880
          sectors are the actual floppy sectors, the
          remaining 320 sectors are unused.  This
          configuration simply makes the disk offsets
          simpler to calculate.  Most USBs will have
          much more than the 1.5GB required for the
          1000 floppy disk images.  In general any
          space after the 1.5GB is unusable by a
          'Windows' system.

          When the USB device is mounted by the system
          it will appear as a single 1.44MB FAT12 file
          system.  The additional 999 floppy images
          are not accessable by standard file system
          utilities.  Access to these floppy images
          is why FDMgr was created.

          Newer windows systems may write hidden system
          information onto your floppy disks and/or
          images.  This is probably not desired and
          may corrupt some images.  A method to disable
          windows from writing system information is
          described in this excerpt from superuser.com.
|
      The initial 'File'
menu options are:
|
|
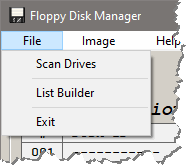 |
Selecting 'Exit' will exit the FDMgr program. To
access a 1000 floppy image USB device click on the
'Scan Drives' option. The program then scans all
disks (excluding A: and B:) on the system searching
for those having a valid 1.44MB floppy file system:
1) a FAT12 Structure and
2) a size of 2880 sectors
The scanning progress will be shown in the progress
bar. If the scanning process detects an external
device it does not recognize then a message box will
appear asking for permission to allow device access.
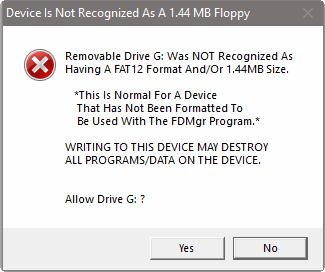 Allowing the drive simply indicates to the FDMgr
program that access will be allowed. No read or
write operations are performed at this point.
|
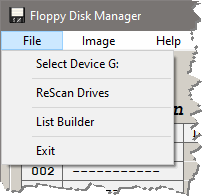
Once the scanning has completed, select the 'File'
menu to show the found USB (or other) devices.
Device letters are system dependant.
|
|
 |
If no device is found then check that the USB device
is attached to your computer. If the device to be used
was an 'allowed' device, then this device should be formatted
as described in the Format USB Device Disks(0-999) section.
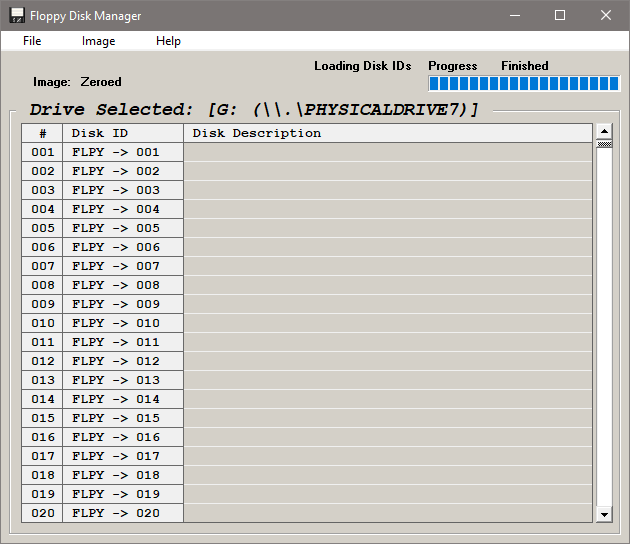
Once your device is recognized during the scan drives
process, select it from the menu. The program will read
the device and load the disk IDs into the Disk Selector Grid:
|
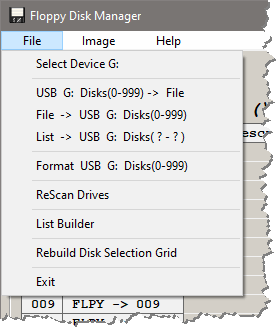
        Now that a 1000 Floppy Disk USB device has been
      selected, the 'File' menu will show the following
      options:
|
|
 |
 Format USB Device Disks(0-999)
 The 1000 Floppy Disk USB device appears to the
operating system (Windows) as a single 1.44MB floppy
disk with a FAT12 partition. The remaining 999
floppy images are not visible to the system.
This single visible floppy disk, USB Disk(000),
is formatted separately from USB Disks(1-999).
The 'Disk Descriptions' discussed in the 'Edit'
section are stored as a regular file on this
visible floppy disk partition.
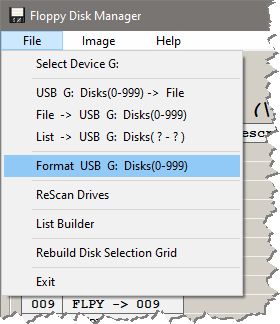
Clicking on the 'Format USB G: Disks(0-999)' opens
a dialog box where the Disk(000) and Disks(1-999)
IDs may be entered:
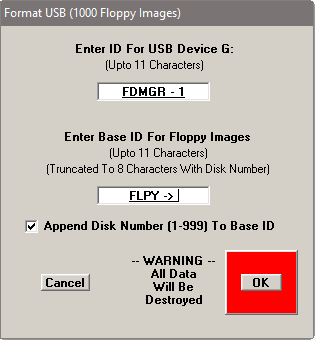 Enter the Disk(000), the visible disk, ID in
the top text box. The ID is truncated to 11
characters.
Enter the base ID for Disks(1-999) in the lower
text box. The ID is truncated to 11 characters if
there is no disk number suffix or truncated to 8
characters with a disk number.
The dialog shows that Disk(000) will have the
ID of 'FDMGR - 1' and Disks(1-999) will have the
IDs of 'FLPY -> 001', 'FLPY -> 002', 'FLPY -> 003',
..., 'FLPY -> 999'.
The 'Cancel' button will exit the dialog with
no changes made to the USB device.
Clicking the 'OK' button initiates the formatting of
the 1000 Floppy Disk USB device. The progress bar
indicates how the formatting is proceeding.
 Once initiated the operation can be aborted by clicking
'Cancel' in the task bar. 'Cancel' only appears in the
task bar during import, export, or format operations.
At the conclusion of the formatting operation
perform the following operations:
File -> Scan Drives
File -> Select Device G:
to see the results of the formatting operation.
 Create A List Of Files To Import To A USB Device
|
The 'List Builder' option provides a method
of creating a list of floppy image files that
can be used to populate the 1000 Floppy Disk USB
device.
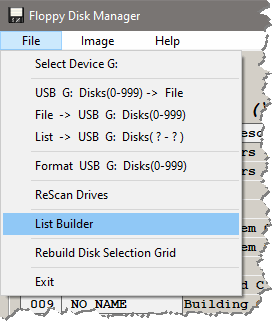
Clicking on the 'List Builder' menu item opens
the dialog window where device and folder boxes
are used to select a folder.
|
|
 |
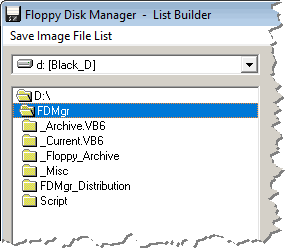
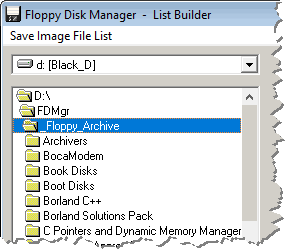
        The device was selected from the drop
      down box as D:.  Double click a folder
      to open it for scanning.
|
 |
==>> |
 |
        The 'Scan And Add Image Files' button proceeds
      to scan the selected folder and all child folders
      for image files.

        (ie files of floppy size - 1,474,560 bytes)
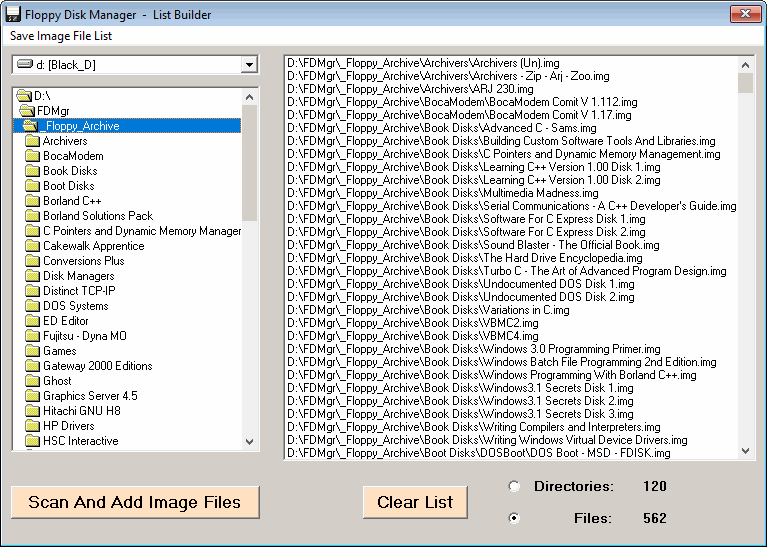 The list box on the right will show the alphabetized
list of folders that were found and searched or the
list of image files found. The total number of unique
folders scanned and number of image files found are
also shown.
Scans of multiple folders can be combined into
a single list. Scanning of the same or overlapping
folders will only add unique combinations of folders
and image files. The 'Clear List' button will
initialize the list as empty.
|
        Clicking 'Save Image File List'
      opens a dialog box to save the list
      of files to be used as an import list
      for the List -> USB option of the
      'File' menu.
|
|
 |
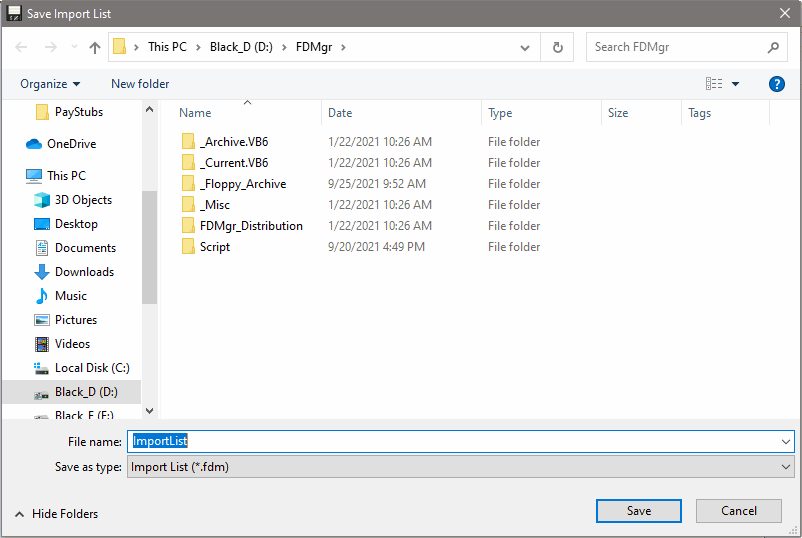 The saved list is a text file with the default extension
of 'fdm'. The list is numbered and organized alphabetically
by path. Files having a common path are grouped together
seperated by a numbered blank line.

 Copy A List Of Files To A USB Device Disks( ? - ? )
|
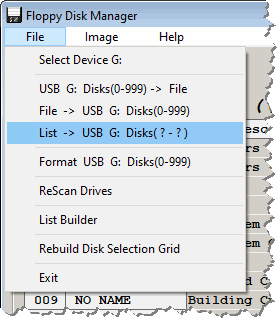
Clicking the 'List -> USB ...' from the 'File'
menu opens the 'Import From Image List' dialog
box. Select an image list created by the
List Builder option from
'File' menu.
The import list file can also be created
manually using your favorite text editor.
The line numbers are optional, however the full
path and file name are required. Include blank
lines to take advantage of the blank line options
and alphabetization is not required. Files will
loaded in the order listed.
|
|
 |
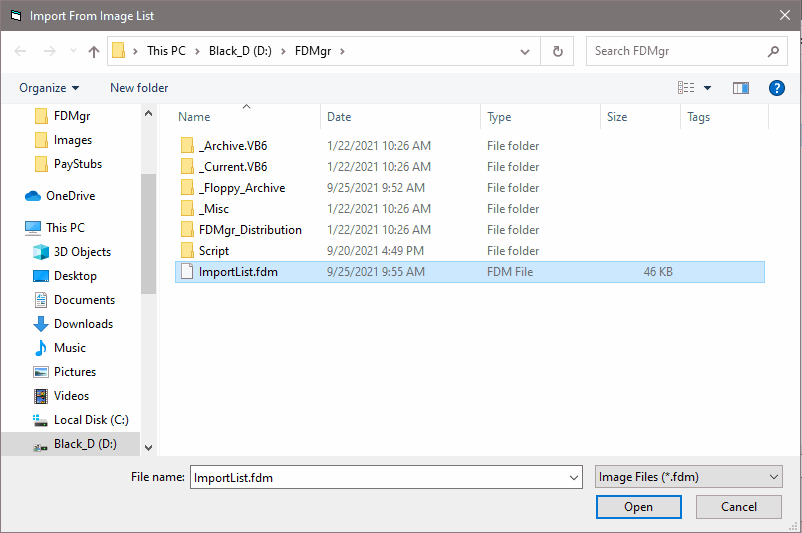 Select an image file list and click the 'Open' button.
The 'List Import Options' window will open with the file
loaded and shown in the list box. As described in the
List Builder section the files are alphabetized and
numbered. Manually created import files donot require
line numbers and are NOT required to be alphabetized.
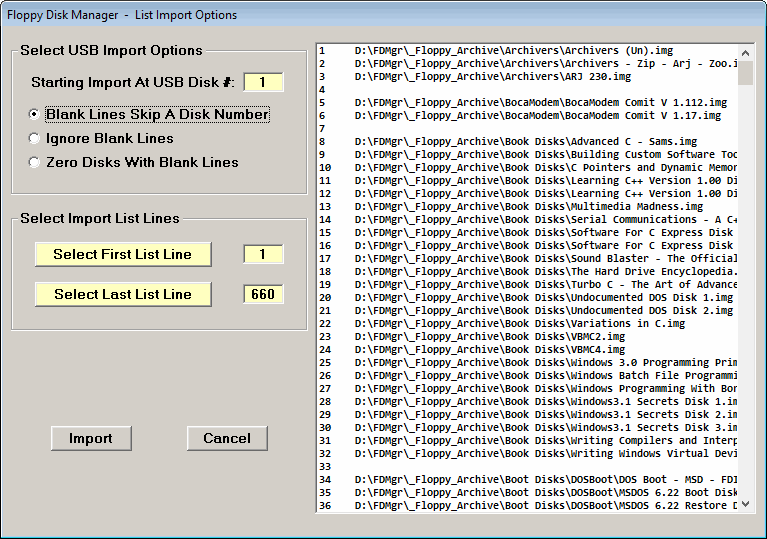 By default the files selected for loading are the
whole list, from the 1st to the last. Select an
alternate 1st file by clicking on the first image file
to load and then click on the 'Select First List Line'
button. The line number will be loaded into the box
to the right of the button. Similarly select the last
list line from the file list.
The image files will be imported to the USB device
starting at the 'Starting Import At USB Disk #'.
Change the starting point by selecting a disk from
the 'Disk Selector' grid of the main program window.
The selected files are imported sequentially with one
of the three options:
'Blank Lines Skip A Line Number'
This option causes the import process to
skip a disk position on the USB device
as an alternate to importing an image file.
'Ignore Blank lines'
This option causes the import process to
ignore the blank line as an alternate to
importing an image file.
'Zero Disks With Blank Lines'
This option causes the import process to
zero the disk positon as the alternate to
importing an image file.
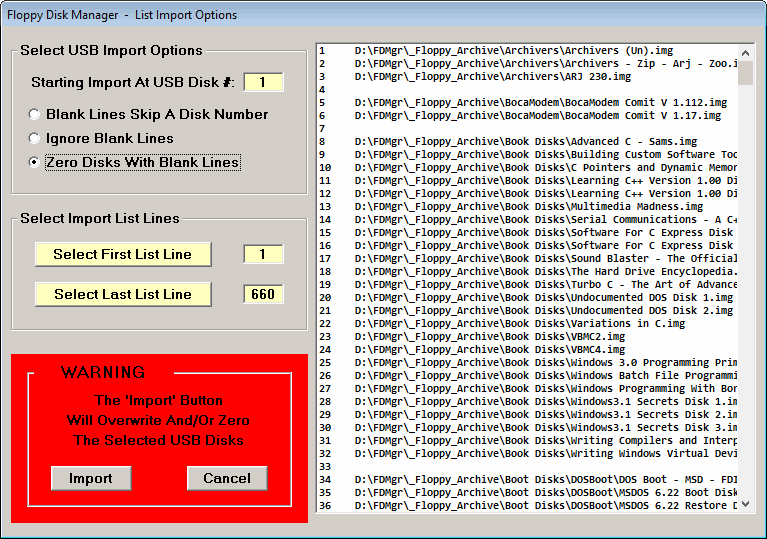
Clicking on the 'Import' button brings up a warning
and a second chance to 'Cancel' the import operation
before writing over any disk images.
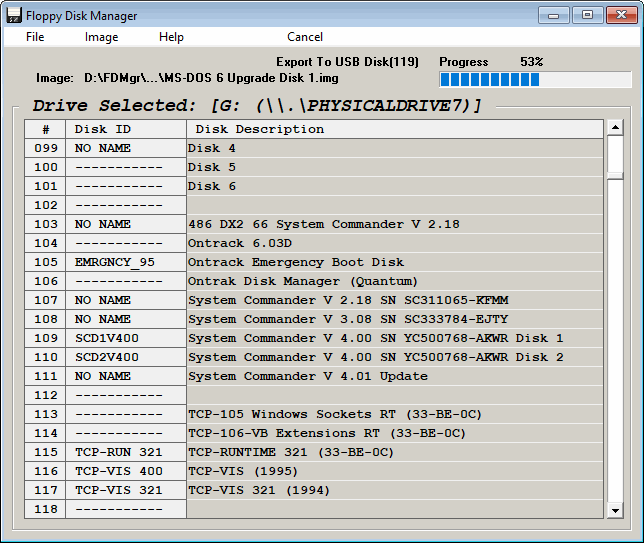
 Clicking the 'Import' button initiates the copying
of image files to the USB device. As each disk image
is loaded the name of the image file is loaded into
the description grid. The grid automatically scrolls
as more images are transferred to the USB device.
 Once initiated the operation can be aborted by clicking
'Cancel' in the task bar. 'Cancel' only appears in the
task bar during import, export, or format operations.
 Copy USB Device Disks(0-999) To An Image File
|
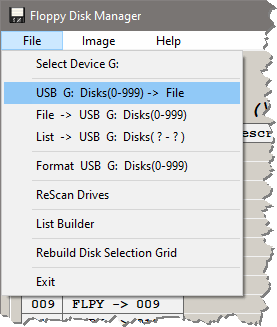
Clicking on the 'USB G: Disks(0-999) -> File' menu item
opens a dialog window to accept a file name for the
1000 Floppy Disk image to be saved. To abort the operation
click the 'Cancel' button.
|
|
 |
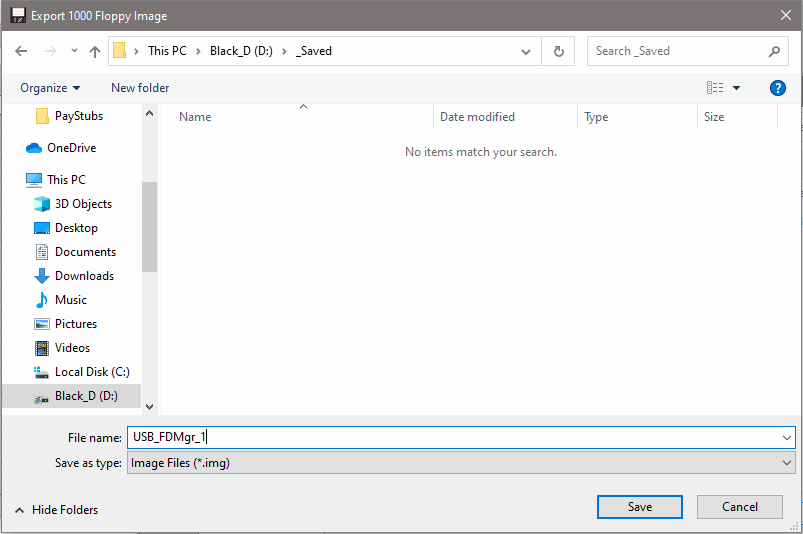 Clicking the 'Save' button initiates the transfer of the
1000 Floppy Disk USB to the specified file. The progress
bar indicates how the transfer is proceeding.
 Once initiated the operation can be aborted by clicking
'Cancel' in the task bar. 'Cancel' only appears in the
task bar during import, export, or format operations.
 Copy An Image File To A USB Device Disks(0-999)
|
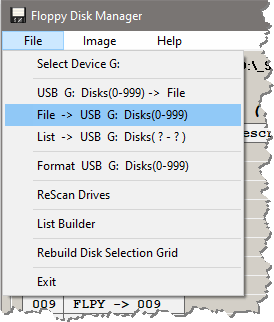
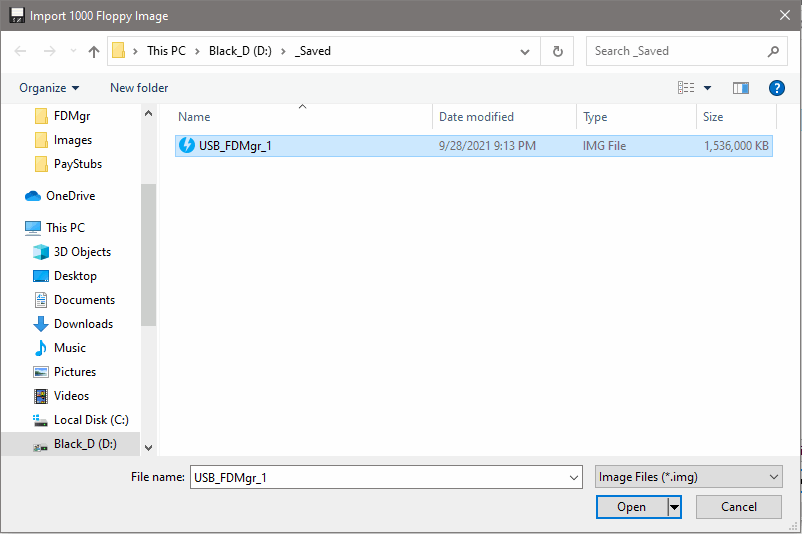
Clicking on the 'File -> USB G: Disks(0-999)' menu item
opens a dialog window to accept a file name for the
1000 Floppy Disk image to be transfered to the USB device.
To abort the operation click the 'Cancel' button.
|
|
 |
|
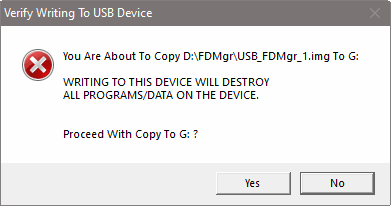
        Clicking the 'Open' button gives one last chance to
      abort the transfer of the 1000 Floppy Disk file to the
      USB device.  Clicking 'YES' will proceed with the copy
      operation.  The progress bar indicates how the transfer
      is proceeding.
|
|
 |
 Once initiated the operation can be aborted by clicking
'Cancel' in the task bar. 'Cancel' only appears in the
task bar during import, export, or format operations.
 Rebuild The Disk Selection Grid
|
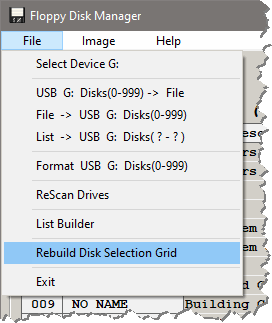
The 'Rebuild Disk Selection Grid' option on the
'File' menu restores the disk description grid from
data stored with the floppy images on the USB device.
This option also writes the file 'DISKS.TXT' into the
base USB directory to recover a lost or currupted file.
|
|
 |
|
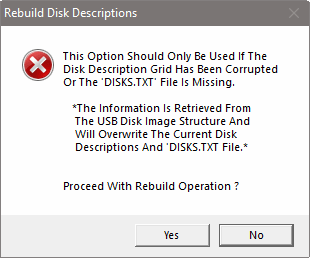
      Clicking this option will open a message box to
      give one last chance to abort the rebuild process.
      Clicking 'YES' will proceed with the rebuild
      operation.
|
|
 |

File - USB Image Manipulation
 Allowing the drive simply indicates to the FDMgr
program that access will be allowed. No read or
write operations are performed at this point.

 Format USB Device Disks(0-999)
 The 1000 Floppy Disk USB device appears to the
operating system (Windows) as a single 1.44MB floppy
disk with a FAT12 partition. The remaining 999
floppy images are not visible to the system.
This single visible floppy disk, USB Disk(000),
is formatted separately from USB Disks(1-999).
The 'Disk Descriptions' discussed in the 'Edit'
section are stored as a regular file on this
visible floppy disk partition.
Clicking on the 'Format USB G: Disks(0-999)' opens
a dialog box where the Disk(000) and Disks(1-999)
IDs may be entered:
 Enter the Disk(000), the visible disk, ID in
the top text box. The ID is truncated to 11
characters.
Enter the base ID for Disks(1-999) in the lower
text box. The ID is truncated to 11 characters if
there is no disk number suffix or truncated to 8
characters with a disk number.
The dialog shows that Disk(000) will have the
ID of 'FDMGR - 1' and Disks(1-999) will have the
IDs of 'FLPY -> 001', 'FLPY -> 002', 'FLPY -> 003',
..., 'FLPY -> 999'.
The 'Cancel' button will exit the dialog with
no changes made to the USB device.
Clicking the 'OK' button initiates the formatting of
the 1000 Floppy Disk USB device. The progress bar
indicates how the formatting is proceeding.
 Once initiated the operation can be aborted by clicking
'Cancel' in the task bar. 'Cancel' only appears in the
task bar during import, export, or format operations.
At the conclusion of the formatting operation
perform the following operations:
File -> Scan Drives
File -> Select Device G:
to see the results of the formatting operation.
 Create A List Of Files To Import To A USB Device

 The list box on the right will show the alphabetized
list of folders that were found and searched or the
list of image files found. The total number of unique
folders scanned and number of image files found are
also shown.
Scans of multiple folders can be combined into
a single list. Scanning of the same or overlapping
folders will only add unique combinations of folders
and image files. The 'Clear List' button will
initialize the list as empty.
 The saved list is a text file with the default extension
of 'fdm'. The list is numbered and organized alphabetically
by path. Files having a common path are grouped together
seperated by a numbered blank line.

 Copy A List Of Files To A USB Device Disks( ? - ? )

 Select an image file list and click the 'Open' button.
The 'List Import Options' window will open with the file
loaded and shown in the list box. As described in the
List Builder section the files are alphabetized and
numbered. Manually created import files donot require
line numbers and are NOT required to be alphabetized.
 By default the files selected for loading are the
whole list, from the 1st to the last. Select an
alternate 1st file by clicking on the first image file
to load and then click on the 'Select First List Line'
button. The line number will be loaded into the box
to the right of the button. Similarly select the last
list line from the file list.
The image files will be imported to the USB device
starting at the 'Starting Import At USB Disk #'.
Change the starting point by selecting a disk from
the 'Disk Selector' grid of the main program window.
The selected files are imported sequentially with one
of the three options:
'Blank Lines Skip A Line Number'
This option causes the import process to
skip a disk position on the USB device
as an alternate to importing an image file.
'Ignore Blank lines'
This option causes the import process to
ignore the blank line as an alternate to
importing an image file.
'Zero Disks With Blank Lines'
This option causes the import process to
zero the disk positon as the alternate to
importing an image file.
Clicking on the 'Import' button brings up a warning
and a second chance to 'Cancel' the import operation
before writing over any disk images.
 Clicking the 'Import' button initiates the copying
of image files to the USB device. As each disk image
is loaded the name of the image file is loaded into
the description grid. The grid automatically scrolls
as more images are transferred to the USB device.
 Once initiated the operation can be aborted by clicking
'Cancel' in the task bar. 'Cancel' only appears in the
task bar during import, export, or format operations.
 Copy USB Device Disks(0-999) To An Image File

 Clicking the 'Save' button initiates the transfer of the
1000 Floppy Disk USB to the specified file. The progress
bar indicates how the transfer is proceeding.
 Once initiated the operation can be aborted by clicking
'Cancel' in the task bar. 'Cancel' only appears in the
task bar during import, export, or format operations.
 Copy An Image File To A USB Device Disks(0-999)


 Once initiated the operation can be aborted by clicking
'Cancel' in the task bar. 'Cancel' only appears in the
task bar during import, export, or format operations.
 Rebuild The Disk Selection Grid

